Monday, June 28, 2010

IDC Dinners

Some days...I'm so tired and exhausted. We had an awesome weekend with my family, my wedding shower and a dinner party/reunion of parents and I am absolutely BEAT today! I didn't feel motivated to put a lot of time and energy into dinner so I went surfing through the cabinets for some creative energy. This is an IDC Dinner...aka I Don't Care! However, it turned out delicious! I am a huge fan of homemade mashed potatoes...its the only ones that were made in my home growing up. Pretty easy to whip up something there as well!


IDC Dinner ala Sassy Pants

1 can Heart Healthy Cream of Chicken
1 can Rotel (I used Hot...but if you're not a fan of spicy foods...stick to mild and original)
1.5 cups sliced mushrooms (I had some in the fridge that needed to be used before I lost them)
.5 cup shaved Asiago Cheese
4 boneless skinless chicken breasts (4-oz each)

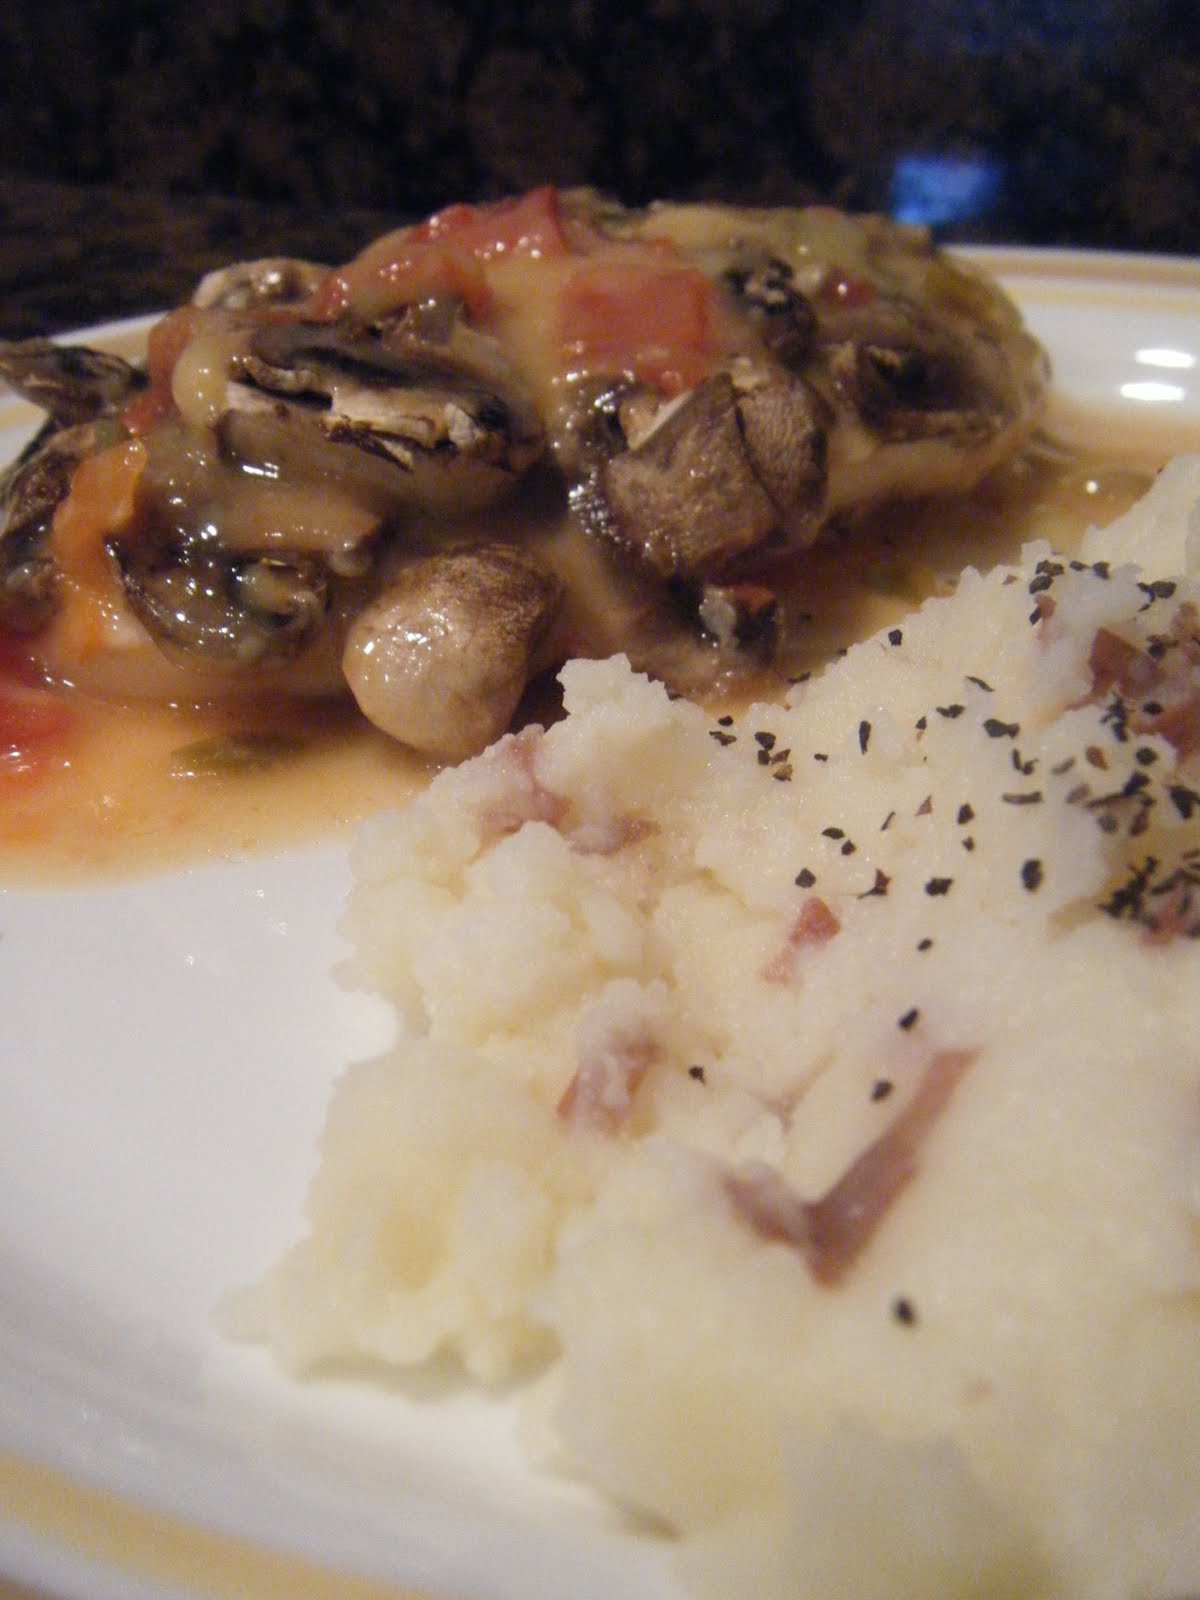
Combine all ingredients, except for cheese in a 9x13 baking dish. Make sure cream of chicken and rotel is blended. Bake at 350 degrees for 45-50 minutes. During last 10 minutes of baking, place shaved cheese on top of chicken place back into oven.

Tada! Easy entree!

Homemade Mashed Potatoes

10-12 red potatoes
3-4 garlic cloves, minced
.5 cup shredded Parmesean cheese
1 cup milk (I happened to have low-fat buttermilk)
.5 stick margarine
salt to taste
pepper to taste

I like to leave my skins of my red potatoes because they are 1. Pretty and 2. I like the skins of the potato...but its totally optional!

Cut potatoes in to small pieces and place in a pan of water. Set water to boil.

Once potatoes have boiled, tender and nearly falling apart, drain the potatoes leaving a small amount of water in the bottom of the pan. Using a mixer, mix the potatoes adding milk until you get the desired texture. I do mine by taste and look and it may take a little more milk or a little less. Add garlic, margarine, salt, pepper and cheese and mix until smooth.

This was just the particular variation of the day...sometimes I add and subtract ingredients. If you ever make a few good batched of homemade mashed potatoes...you will never go back! Yum!

The Jean Greene Chocolate Pie

This recipe is not for the instant dessert enthusiast...it takes a lot of tedious time but the outcome is absolutely phenomenal!! My mom has been making these pies for YEARS and just recently I got the recipe and got to watch it from start to finish a few times to get all of the techniques she uses to make it happen. We were invited to a dinner party/reunion and we were asked to bring the dessert and my mom said we could do the pies and once she mentioned it...there was no way we WEREN'T going to take the pies. They were nearly demolished...I may be taking my hand at it this weekend for Jason's family weekend...I hope I can keep up this fabulous recipe for many years to come!


Jean Greene's Chocolate Meringue Pie

Pie Ingredients

1 Frozen Pie Crust such as Mrs. Smith, thawed
1¼ cups sugar
¼ cup flour
1/3 cup unsweetened cocoa powder
1 stick margarine
1 tsp vanilla
4 egg yolks
1¼ cup milk (I wouldn't get too skimpy here...we use 2%)
Dash of salt

Meringue Ingredients

Sugar
4 egg whites


Preheat Oven to 350 degrees.

Thaw 1 Frozen Pie Crust and using a fork, poke several holes. Place in the oven and bake for just a few minutes. The holes in the crust keep it from puckering and bubbling. Once pie crust is warm, take it out of the oven and set on counter.

Don't turn off oven and increase heat to 400 degrees

Beat egg yolks until smooth. In a thick stainless steel dutch oven, combine milk, butter, salt, eggs and vanilla extract. Turn to medium/medium-high and allow butter to melt and the mixture to get hot.
**The more melted you get the butter mixture the quicker the next part begins**

Combine sugar, flour and cocoa in a large bowl, mix well.

Fold in the mixture while using a whisk, stir stir stir.

You will need to continuously stir or else the mixture will scorch or will cling to the bottom of your pan. Don't stop stirring until the mixture is nearly too thick to stir anymore. This does take a while so just be patient.

Once your mixture is super thick, pour into your pie crust.

Next move on to the meringue. Make sure that you don't drop even the smallest piece of yolk when making your meringue or else you will not be able to fluff the meringue.

Using a mixer, whip your egg whites, folding in sugar (no exact measurement...I'm guessing we used around a half a cup per pie). You will whip...and whip...and whip until you get the desired "height" for your meringue. After baking the meringue tends to go down so make sure you have plenty of "fluff" for the top of your pies. We fluffed until we had almost a whole medium mixing bowl full of meringue.

Spoon the meringue mixture onto the pie, swirling to create little tips all across the pie. Make sure you cover the entire pie leaving no spaces showing.

Place pie into the oven and when you start seeing the meringue brown up around your swirls...your pie is done! Let cool and serve!

You will be the new fan favorite if you make this dessert. I will have to let you know how it goes when I try it solo!

Cheesecake Brownies

So for several weeks I had been craving sweets...and I always seemed to be missing ONE ingredient necessary to fix most of the healthy desserts I wanted to try. This one was a SURE winner! The texture was more "cake-like" than brownie but never the less it satisfied exactly what I was looking for!

Cheesecake Brownies
Adapted from Hungry Girl 1-2-3 Cookbook

18.25-oz box devil's food cake mix
15-oz can pure pumpkin
6-oz fat-free cream cheese, room temperature
1/4 cup Splenda No Calorie Sweetener (granulated)
1 t Coffee-mate Sugar Free French Vanilla powdered creamer
1/4 t vanilla extract

1. Preheat oven to 400 degrees

2. In a large mixing bowl, combine cake mix adn pumpkin, stirring until completely blended. Batter will be very thick.

3. Spray a large baking pan (9x13) with nonstick spray. Spread batter into pan and set aside

4. Place powdered creamer in a medium mixing bowl. Add 2 T warm water and stir until creamer has dissolved. Add cream cheese, Splenda, and vanilla extract. Using a whisk, mix vigorously until completely blended, smooth, and lump free.

5. Spoon cheesy mixture over the brownie batter and use a knife to swirl it in.

6. Bake in the oven for 20-25 minutes, until a knife inserted into the center comes out clean. Allow brownies to cool completely.

Makes 16 servings that are HUGE and only around 150 calories! Score!

Caesar Salad

Jason and I are HUGE fans of Caesar Salad. I've always wanted to take my chances at making this dressing and I finally did and it was fabulous! Of course I couldn't just make an unhealthy version...I had to make it so that I can find myself happily in my wedding dress in a few months...enjoy!


Caesar Dressing - Healthy Style!

5 T extra-virgin olive oil
4 cups (1-in) cubed french bread (I used whole wheat bread that I cubed)
1 (2-oz) can anchovy fillets, drained
2 T grated fresh Parmigiano-Reggiano cheese (Pay attention...unlike me who went to Harris Teeter and paid $11 dollars for a wedge of this! I'm sure regular parmesean cheese would be fine!)
2 T red wine vinegar
2 large pasteurized egg yolks
1 garlic clove (I used more!)
6 torn romaine hearts
1/4 t kosher salt (I used Sea Salt)

1. Preheat oven to 350 degrees
2. Combine 1 T oil and bread in large bowl, tossing to coat. Arrange bread in a sing layer on a baking sheet; bake at 350 for 15 minutes or until golden (I added some garlic salt for a little extra umph). Cool.
3. Pat anchovy fillets dry with a paper towel. Combine fillets, cheese, and next 3 ingredients in a blender. Process until smooth. With blender on, add remaining 1/4 cup oil, 1 T at a time; process until smooth. Combine croutons and lettuce in a large bowl; drizzle lettuce and croutons evenly with dressing; toss to coat. Sprinkle salad mixture evenly with salt. Toss to combine and serve immediately.

**Not pictured with croutons**

Wednesday, June 23, 2010

Spaghetti with Sausage and Tomato Sauce

Tonight's meal was delicious, also my first real attempt at making my own spaghetti sauce! I used a simple concept with tomato sauce and the turkey sausage was a great touch. This was super simple to put together and dinner was done by 6:15...super quick too! Yum!

8 ounces hot Italian turkey sausage links
8 ounces uncooked spaghetti
1 (28-ounce) can no-salt added whole tomatoes, undrained
2 T olive oil
1/2 t crushed pepper
5 garlic cloves, minced
1 t sugar
1/2 t kosher salt (I used Sea Salt)
1/4 cup torn fresh basil
1/2 cup shaved Parmigiano-Reggiano cheese (Very expensive...thanks a lot Harris Teeter!)


1. Preheat broiler
2. Arrange sausage on a small baking sheet. Broil sausage 5 minutes on each side or until done. Remove pan from oven (don't turn off broiler). Cut sausage into 1/4-inch thick slices. Arrange slices in a single layer on baking sheet. Broil sausage slices 2 minutes or until browned.
3. Cook pasta according to the package directions, omitting salt and fat; drain.
4. Place tomatoes in a food processor; process until almost smooth. Heat olive oil in a large nonstick skillet over medium-high heat. Add crushed red pepper and minced garlic; saute 1 minute. Stir in tomatoes, sugar, and salt; cook 4 minutes or until slightly thick. Add sausage and cooked pasta to pan; too well. Top with fresh basil and Parmigiano-Reggiano.

Enjoy!

Tuesday, June 22, 2010

Mexican Makeover!

Usually Tuesday nights are reserved for Taco Tuesday at our favorite local Mexican restaurant...it didn't really pan out tonight but I decided I was still in the mood for my Mexican food fix! I made over the basic Taco Salad and created my own Taquitos! Super satisfying and healthy!

For the taco salad I used a round casserole dish and baked the tortilla formed to the shape of the "Taco Salad Shell". I did this for about 10 minutes at 425 degrees. The smaller your casserole bowl the better...mine was larger creating a wider bowl and less of the shell shape. Just spray your dish, form and bake and you have your own Taco Salad Shell. I filled mine with shredded iceburg, 99% lean ground turkey cooked in taco seasoning and about a 1/3 cup of fat free cheddar cheese. Jason likes to add Fat Free Sour Cream to his.

The taquitos were exactly what I was hoping for...my Mexican fix has been satisfied for the day! Thank you Hungry Girl for another fabulous recipe!

Chicken Taquitos

1 9.75-ounce can 98% fat-free chunk white chicken breast in water, drained and flaked
1/2 cup salsa
1/3 cup shredded fat-free cheddar cheese
1/4 t dry taco seasoning mix (I always use reduced sodium...if you have ever looked at the back of the Taco Seasoning you would cringe!)
8 6-inch corn tortillas


Preheat oven to 375 degrees

In a medium bowl, combine the chicken and salsa, and mix thoroughly. Cover and refrigerate for 15 minutes.

Remove chicken mixture from the fridge and drain any excess liquid. Add cheese and taco seasoning, mix to combine. This is your filling. Set aside.

Prepare a baking sheet by spraying with nonstick spray and set it aside.

Dampen two papertowels and place tortillas between them. Microwave for about 1 minute, until tortillas are warm and pliable.

Take one tortilla (keeping the rest between the paper towels), spray both sides lightly with nonstick spray, and it flat on a clean dry surface. Spoon about 2 heaping tablespoons of filling on the tortilla. Spread it evenly across the entire surface, and roll tortilla up tightly so that you have a cigar-shaped tube. Secure with toothpicks and place seam-side down on the baking sheet. Repeat with remaining tortillas and filling.

Bake in the oven for 14-16 minutes or until crispy. Allow taquitos to cool for 5 minutes.

Monday, June 21, 2010

Blue-Cheese Stuffed Chicken with Buffalo Sauce and Sweet Potato Mash

Yum! Its back to the normal kitchen schedule...and tonight's selection was a huge winner. Candice...the Sweet Potato Mash is just for you! =) This was a great dish...super filling and of course...super healthy! The roasted red pepper/hot sauce topping really capped off a unique flavor. Enjoy!

Blue Cheese-Stuffed Chicken with Buffalo Sauce
1/2 Cup Crumbled Blue Cheese
1 T reduced-fat sour cream (I used Fat-Free)
1 t fresh lemon juice (I used Real Lemon)
1/8 t freshly ground black pepper
4 (6-ounce) Boneless skinless chicken breast halves
1/4 c all-purpose flour
2 T 2% reduced fat milk (I used Skim)
1 large egg, lightly beaten (I used Egg Beaters)
1 cup Panko/Japanese Breadcrumbs (My favorite!)
1.5 T butter, divided
6 T finely chopped drained bottled roasted red bell peppers
2 t water
1 t Worcestershire sauce
1 t minced fresh garlic
1/2 t hot sauce (So maybe I sprinkled some extra....)

1. Preheat oven to 350 degrees
2. Combine first 4 ingredients in a small bowl. Cut a horizontal slit through thickest portion of each chicken breast half to form a pocket. Stuff cheese mixture evenly into pockets.
3. Place flour in a shallow dish. Combine milk and egg in a shallow dish. Working with 1 chicken breast half at a time, dredge chicken in flour, then dip in egg mixture; dredge in panko. Repeat procedure with remaining chicken, flour, egg mixture, and panko.
4. Heat a large ovenproof skillet over medium-high heat. Ad 1 T butter to pan; swirl until butter melts. Arrange chicken in pan; cook 4 minutes or until browned. Turn chicken over; place skillet in oven. Bake at 350 degrees for 20 minutes or until done.
5. While chicken backs, combine remaining 1.5 t butter, bell peppers, water, Worcestershire, and garlic in a small sauce-pan over medium heat. Bring to a simmer; cook until butter melts. Remove from heat, and stir in hot sauce. Serve sauce with chicken.


Sweet Potato Mash

3 lb sweet potatoes, peeled and cut into 1.5 inch chunks
3 T unsalted butter
2/3 low fat milk (Skim here!)
1 t salt
1/4 t black pepper

1. Bring potatoes and enough water to cover to a boil in a pot. Cook until fork-tender, 18 minutes.
2. About 5 minutes before the cooking time is up, melt the butter in a small skillet over medium heat. Cook, swirling the skillet, until the butter is browned, 2-3 minutes. Remove the skillet from the heat.
3. Drain the potatoes and return them to the pot. Add the browned butter, milk, salt and pepper. With a potato masher, mash the potatoes until fairly smooth.

Saturday, June 19, 2010

Saturday Morning Breakfast

I love when we actually have time to put together a breakfast. This morning we put together some of the normal favorites plus I made a new recipe of chocolate chip pancake minis. We used Turkey Sausage this morning, Jason made and omelet and the chocolate chip mini pancakes tied it all together. Yum!


Oat-rageous Chocolate Chip Mini Pancakes

3 T regular oats
3 T fat-free liquid egg substitute
2 T whole-wheat flour
1 T light vanilla soy milk (We didn't have this so I substituted by using 1 T skim milk with a dash of vanilla extract and splenda)
1/2 T mini semi-sweet chocolate chips
1/4 t Baking Powder
1/8 t vanilla extract
1 no-calorie sweetener packet
Dash salt

1. Place all ingredients in a small bowl, except for chocolate chips. Add 1 T water and stir until thoroughly mixed. Fold in chocolate chips.

2. Bring large pan sprayed with nonstick spray to medium heat. Pour batter in the pan to form 5 mini pancakes. Once pancakes begin to look solid, after about 1 minute, gently flip.

3. Cook for an additional minute, or until both sides are lightly browned and insides are cooked through. Enjoy!

Friday, June 18, 2010

Chicken Tetrazzini

Another new favorite dish of mine! This dish is PERFECT to serve at a dinner party or feeding a family. I still have enough leftovers to feed about 4-6 more people! The best part of this was the extreme simplicity involved in creating this dish. Once you cook up your spaghetti and saute your mushrooms you just throw it all into a big baking dish and let it ride. This dish also has lots of flexibility...I think it would be even more fabulous by sauteing up more veggies. Enjoy!

Chicken Tetrazzini

12 ounces uncooked spaghetti (I used Whole Wheat as usual)
2 T light stick butter
1 (8-ounce) package presliced mushrooms (I sliced my own whole mushrooms...more bang for your buck!)
3 Cups chopped cooked chicken breast
2 (10.75-oz) cans condensed 45% reduced sodium, 98% fat-free cream of mushroom soup, undiluted
2 cups reduced-fat sour cream (I loathe the end of the week...I ran out of FF Sour Cream and substituted 1 cup for plain nonfat yogurt...still worked and tasted amazing!)
1/2 t freshly ground black pepper
Cooking spray
1/3 c grated Parmesan cheese
Chopped Fresh Parsley (I only had dried...give me a break...we're depleting the groceries for the week...)

1. Preheat oven to 350 degrees
2. Cook spaghetti according to package directions, omitting salt and fat. Drain
3. While pasta cooks, melt butter in a nonstick skillet over medium-high heat. Add mushrooms and saute 4 minutes or until tender.
4. Combine pasta, mushrooms, chopped chicken, and the next 3 ingredients.
5. Pour chicken mixture into a 13x9 baking dish coated with cooking spray. Sprinkle with Parmesan cheese. Bake at 350 for 55 minutes or until bubbly. Let stand 5 minutes before serving. Sprinkle with parsley. Enjoy!

Chicken Tetrazzini

Light Chicken Cordon Bleu

I LOVE Chicken Cordon Bleu. I was excited to come across this recipe in the Taste of Home Comfort Food Diet Cookbook. There is an amazing selection of "favorites" and this was definitely a winner!


8 boneless skinless chicken breast halves
1/2 t pepper
8 slices lean deli ham (around 1 oz. each)
1.5 cups shredded part-skim mozzarella cheese
2/3 cup fat-free milk
1 cup crushed cornflakes (You know me...I stuck to Panko!)
1 t paprika
1/2 t garlic powder
1/4 t salt

Sauce: *Not pictured...my sauce wasn't very photogenic...)
1 can reduced fat reduced sodium condensed cream of chicken soup undiluted
1/2 c fat-free sour cream
1 t lemon juice

Flatten chicken to 1/4-in. thickness. Sprinkle with pepper; place a ham slice and 3 T of cheese down the center of each piece. Roll up and tuck in ends; secure with toothpicks. Pour the milk into a shallow bowl. In another bowl, combine the cornflakes, paprika, garlic powder and salt. Dip chicken in milk, then roll in crumbs.

Place in a 13x9 in. baking dish coated with cooking spray. Bake, uncovered, at 350 degrees for 25-30 minutes or until the meat is no longer pink. Meanwhile, in a small saucepan, whisk the soup, sour cream and lemon juice until blended; heat through. Discard toothpicks from chicken and serve with sauce.

Cauliflower Au Gratin

What a surprise this delicious side dish turned out to be! Once again, I utilized another vegetable that DF did not like and turned it into something that he loved and was even caught "cleaning the bowl" with the spoon. It more closely tasted like mashed potatoes with a delicious cheesy, crunchy top. Another vegetable side winner here!

Cauliflower Au Gratin

1 Head Cauliflower
1/2 cup shredded fresh Parmesan cheese, divided
1/4 cup fat free sour cream
2 T fat-free half and half
1/2 t seasoned salt
1/4 t pepper
Cooking Spray
1/4 cup Italian Seasoned Bread Crumbs (I used Panko instead and added Italian seasoning)
1 t butter, melted
1/2 t Cracker Girl Seasoning (My mom brought me this and it is fabulous...its a spicy seasoning that I use in a lot of recipes...google it!)

1. Preheat oven to 400 degrees
2. Cut cauliflower lengthwise into quarters, removing outer leaves and stalk and break into florets. Steam, covered, in a Dutch oven 8 minutes or until tender
3. Place 2 cups cauliflower, 1/4 cup cheese and next 4 ingredients in a blender or food processor; process until smooth. Place remaining cauliflower in a bowl, and stir in pureed cauliflower mixture. Spoon into a 1.5 quart baking dish coated with cooking spray. Combine remaining 1/4 cup cheese, breadcrumbs, and butter in a small bowl, tossing well with a fork. Sprinkle crumb mixture over cauliflower mixture.
4. Bake at 400 degrees for 25 minutes or under golden and bubbly.

Enjoy!

Skillet Sloppy Beef Sandwiches

Yum! What a great substitute for a sloppy joe. I particularlly loved the massive amounts of veggies that were snuck in here. However, they were only sneaky to me...DF had no problem finding the stewed tomatoes. This is a great dish if you need to throw out something in a hurry!

Skillet Sloppy Beef Sandwiches

Cooking Spray
1 pound Lean Ground Beef (I used 96/4)
1 cup refridgerated prechopped tricolor bell pepper (bell peppers really aren't my thing...these were omitted from my cooking)
1/2 cup frozen whole-kernel corn
1 (14.5 oz) can Mexican-style stewed tomatoes with jalapeno peppers, undrained (I thought these existed in my pantry, but it was actually the Italian Stewed...still good flavor but I'm sure the Mexican is better!)
1/4 cup + 2 T ketchup
4 Whole-Wheat Hamburger buns (I always lightly toast my buns in the toaster oven)


1. Heat a large nonstick skillet over medium-high heat. Coat pan with cooking spray. Add beef and bell pepper; saute 4 minutes or until beef is browned, stirring to crumble. Drain well; return meat mixture to pan. Add corn, tomatoes, and ketchup; cook 9 minutes or to desired consistency. Serve on buns.

**Always be cautious when using super lean meats such as 96/4 ground beef and 99% lean turkey. These can dry out super quickly so when cooking with them make sure you don't overcook them or else you will have something left to be desired with you meal. That gives healthy food a bad name**

Monday, June 14, 2010

Asiago-Crusted Pork Chops and Broccoli with Sour Cream Sauce

This is one of THE best recipes I have eaten in quite some time!! DF is happy...I'm happy...look to see this main course reappear sooner than later with a different side dish. I love to find a recipe that is healthy and as delicious as this combination. The sauce was so delicious for the broccoli that DF ate TWO servings of vegetables...how about that?!


Asiago-Crusted Pork Chops
Adapted from Cooking Light Fresh Food Fast

4 (4-ounce) boneless center-cut loin pork chops
1 egg white, lightly beaten
1/2 cup panko/Japanese Breadcrumbs
1/4 cup grated Asiago Cheese
1/4 t salt
1/4 t black pepper
1 T olive oil
4 lemon wedges (I just dropped some drops of real lemon)
2 t chopped fresh thyme (I used dried and a little extra...buying herbs for one recipe gets expensive!)

1. Place pork between 2 sheets of plastic wrap; pound to an even thickness of about 1/4 inch using a meat mallet or a small heavy skillet.
2. Place egg white in a shallow dish. Combine panko, cheese, salt, and pepper in a shallow dish. Dip pork in egg white; dredge in panko mixture, pressing gently with fingers to coat.
3. Heat oil in a large nonstick skillet over medium heat. Add pork; cook 3-4 minutes on each side or until lightly browned. Squeeze 1 lemon wedge over each chop; sprinkle evenly with thyme.


Broccoli with Sour Cream Sauce
Adapted from Cooking Light Fresh Food Fast

1 (12-ounce) package refrigerated broccoli florets
1/3 cup reduced-fat sour cream (I used Fat Free)
2 T 1% low-fat milk (I used a little less than 2 Tbsp due to using Skim...its all in the preference of liquidity)
1 t Dijon Mustard (I used Spicy Brown instead...that's more our style)
1/4 t salt

1. Microwave broccoli according to package directions
2. While the broccoli cooks, combine sour cream and the remaining ingredients in a small saucepan. Cook over medium heat until thoroughly heated, stirring frequently (Do not boil!)
3. Arrange broccoli on individual serving plates; drizzle with sauce.

Enjoy!

Friday, June 11, 2010

Buffalo Chicken Skewers and Hustle 'n Brussels Foil-pack Attack

Tonight was an absolute kitchen nightmare...but somehow I managed to get a delicious dish on the table! We began the evening working on the marinade for the skewers when we realized we were out of ketchup. I loathe running out of basic staples in my kitchen. In fact, it infuriates me! Luckily I used my brain and remembered we had some ketchup packets from a fast food trip in one of the kitchen drawers. Score! Then I went to create my lovely side dish and realized I didn't have any more onions, rosemary or kosher salt. I was able to wing the recipe and it was a new favorite I believe (I'll go into detail in the recipe). Then thirdly...the gas grill ran out of gas about half way through grilling the chicken skewers. The recipe called to broil them in the oven so they ended up having to finish out there.

Now for the good stuff!

Buffalo Chicken Skewers

1 lb Chicken Breast Tenders
1/4 cup hot sauce (I used Frank's Red Hot Buffalo Style)
3 T light stick butter, melted
1 T ketchup (Or in case you wanted to know...two fast food packets of ketchup are equal to 1 tablespoon!)
1/4 t salt
Cooking Spray


1. Preheat Broiler (I intended to fully grill mine using a grill pan...instead I had half grilled half broiled)
2. Place each chicken tender between 2 sheets of heavy-duty plastic wrap; pound to 1/4-inch thickness using a meat mallet or rolling pin. Cut each tender in half crosswise.
3. Combine hot sauce, butter, and ketchup in a medium bowl; reserve 3 T mixture and set aside. Add chicken to bowl and toss well. Thread 1 piece of chicken onto each of 18 inch skewers (I only had long skewer sticks, so I did two tenders to each stick)
4. Cover a large backing sheet with foil, and coat with cooking spray. Place skewers on a prepared pan, and broil 3 minutes on each side or until done. Brush with reserved 3 T of hot sauce mixture.


Hustle 'n Brussels Foil-Pack Attack - Hungry Girl 1-2-3 Cookbook

10 Brussels Sprouts (or 14 if small), halved
4 baby red potatoes (I used 3...for two servings...this recipe is huge!)
1/2 cup chopped onion (I sprinkled 1 T of Onion Powder since I didn't have Onions tonight)
1 t Olive Oil
1 t dried rosemary (Once again...I didn't have this ingredient...I used 1/2 t each of Tarragon Leaves and Thyme...yum!)
1/2 t chopped garlic (I never measure my garlic...we love garlic...I'm sure we had closer to 3x that)
1/2 t coarse salt (Another ingredient my kitchen was lacking...I used sea salt instead...still a great flavor!)

Preheat oven to 400 degrees

Combine all ingredients in a bowl and mix well. Set aside

Lay a large piece of heavy-duty foil on a baking sheet. Place veggie-potato mixture int he center of the foil and spread it out a bit

Place another large piece of foil over the veggie-potato mixture. Fold together and seal all four edges of the two foil pieces, forming a well-sealed packet.

Place the baking sheet in the oven and bake for 30-35 minutes, until veggies are tender.

Allow packet to cool for a few minutes, and then cut to release steam before opening entirely.

Absolutely amazing! Jason loved it and the serving sizes were HUGE! For those who don't believe they will like Brussels Sprouts...I think you will be pleasantly surprised with this recipe. Yum!

Holy Moly Cannoli Cones

If you thought that the breakfast cannoli stuffed french toast looks delicious but breakfast is too early...this is a quick cannoli fix to satisfy the sweet tooth. We LOVED these! They are going to quickly become a weeknight favorite! Thank you Hungry Girl for another delicious meal from your new cookbook!


Holy Moly Cannoli Cones

1 Cup + 2 T Fat-Free Ricotta Cheese
2/3 cup Cool Whip Free, thawed
2.5 T Splenda granulated
1 T sugar-free fat-free vanilla instant pudding mix
1 T powdered sugar
2 T mini semi-sweet chocolate chips, divided
6 Sugar Cones (The box was titled Old Fashioned Sugar Cones)

Place all ingredients except chocolate chips and sugar cones in a medium bowl Using a handheld electric mixer set to high speed, mix until fully combined and fluffy. Fold in half of the chocolate chips.

Transfer mixture to a large plastic bag, squeezing it down toward one bottom corner of the bag. Snip that corner off with scissors, so that you have a makeshift piping bag

Gently squeeze the ricotta mixture into the cones, evenly distributing it among them.

Sprinkle the remaining chocolate chips evenly on top of the filling in each cone.

YUM!

Wednesday, June 9, 2010

Chop Chop Beef Stir-Fry

The flavor of this dish was absolutely delicious! I've always wanted to try a Chinese style dish that was healthy and flavorful and this one was a winner! The texture was too liquidy to my taste...so next Chinese style dish I will try to find something thicker. I even added a few spoonfuls of flour to try to thicken it up. However, the mix of sweet soy and spicy crushed red peppers was a winner! I paired this dish with a quick side of brown rice to absorb some of the liquid so that I could still get all of my flavors. Enjoy!

Chop Chop Beef Stir-Fry...courtesy of the new Hungry Girl Cookbook 1-2-3
Recipe is for ONE serving. I made this at a x4

1/2 c fat free beef broth
1/2 T reduced sodium soy sauce
1/2 T cornstarch
4 ounces raw lean beefsteak fillet, sliced
1/2 T chopped garlic
1/4 t crushed red pepper
2 C broccoli florets (I used frozen and cooked ahead of time)
1 C sugar snap peas (didn't use these)
1 C sliced mushrooms (I quadrupled these...we love mushrooms!)
2 T chopped scallions
Optional: Salt (Didn't use...Soy Sauce and Beef Broth gave us plenty of sodium!)

Combine beef broth, soy sauce and cornstarch in a bowl, and mix until cornstarch dissolves. Add beef, garlic, and crushed red pepper.. Toss to coat and let marinate in the fridge for 10 minutes. (I left mine for 20 while I did a few other things...leaving items marinating for longer only makes them absorb the flavorings better!)

Bring a skillet sprayed with nonstick spray to medium-high heat. Add broccoli, sugar snap peas, mushrooms, scallions, and 1/4 cup of the marinade from the beef. Cook for about 5 minutes, stirring occasionally, until broccoli softens.

Add beef and remaining marinade, and cook until browned and cooked through, about 3 minutes (Mine took longer...but I did have this recipe multiplied by 4)

Reduce heat to low, cover, and let simmer for 2 minutes.

Serve it up and if you like, season to taste with salt.

Tuesday, June 8, 2010

Cannoli-Stuffed French Toast Nuggets

There are no words to describe how amazing these french toast nuggets were! They were also surprisingly filling from one serving. This recipe was an early morning winner...I prepared all of the mixtures the night before so all I had to do was stuff, cut, dip and skillet the nuggets. Hungry Girl has won over my heart again! Enjoy!

Cannoli-stuffed French Toast Nuggets

1/4 c fat-free liquid egg substitute
1/4 t cnnamon
1 t vanilla extract, divided
3 T fat-free ricotta cheese
2 t mini semi-sweet chocolate chips
1 no-calorie sweetener packet
1 light hot dog bun (I used light wheat)
2 t light whipped butter or light buttery spread
1/2 t powdered sugar

Mix egg substitute, cinnamon, and 1/2 t vanilla extract in a small bowl. Set aside

In a separate bowl, combine ricotta cheese, chocolate chips, remaining 1/2 t vanilla extract, and sweetener, and mix well.

Split hot dog bun open lengthwise without fully separating the two halves. Spoon ricotta mixture onto the bottom half of the bun. Gently press the top half down over the filling. Carefully slice into four "nuggets."

Bring a skillet spray with nonstick spray to medium-high heat. Add butter and allow to coat the bottom of the skillet. Meanwhile, coat each nugget on all sides with the egg mixture.

Once butter has melted place nuggets in the skillet and cook for 3-4 minutes, flipping nuggets until golden brown on all sides.

Plate your nuggets, sprinkle with powdered sugar and, if you like serve with syrup for dipping

Monday, June 7, 2010

Queen of the Castle Sliders

When I go visit my family in Kentucky, one trip that I almost indefinitely make is a trip to White Castle. When I saw this recipe in the new Hungry Girl Cookbook I knew I absolutely had to try this one out. Needless to say...it was another huge hit! Once of our top favorites without a doubt. What is great about this recipe is the versatility...these are made with the carmelized onions and pickle that you find on a white castle burger but the possibilities are endless. By the end of dinner I was imagining the other sliders we could make using carmelized onions/blue cheese or barbeque sauce/cheddar cheese. Whatever tickles your fancy is possible!

Queen of the Castle Sliders (I used 1 pound of ground beef and x4 the recipe)

4 ounces raw extra-lean ground beef (I used 96/4)
1/8 t salt
1/8 t onion powder
1/8 t garlic powder
1/8 t black pepper
1/3 c chopped onion
2 slices light bread (I used light wheat and slightly toasted it for crunch)
Hamburger dill pickle chips
Opt: Ketchup, Mustard

Combine beef and seasonings in a small bowl, and knead mixture by hand until integrated. Dvidie seasoned beef evenly into four balls. Flatten and form each ball into a square patty on a plate. Using a knife, make four small slits on the top of each patty.

Bring a skillet sprayed with nonstick spray to medium-high heat. Spread onion out in the skillet. Place the patties on top of the onion, slit-side down, and cover the skillet. Cook for 3-4 minutes (no flipping necessary), or until cooked through.

Meanwhile, cut each slice of bread into four squares, for a total of eight pieces (I toasted my bread slightly before slicing). Feel free to spread ketchup and mustard onto four pices. Set aside.

Once patties are cooked through, scoop each one along with some onion onto one piece of bread. Top each with a pickle chip and then another bread piece (Or the other way around...which I did for photographic purposes) Let cool slightly, and then slide 'em into your mouth.

This was a new favorite! I can't wait to try this out with some other combinations!

Chicken D'lish kebabs

Holy moly these were a hit! I love grilled food and we have certainly gotten our fair share of use out of our grill on the deck. I modified these a bit and they were still delicious. I will definitely be using this marinade again to grill chicken...phenomenal flavor! This is from the latest Hungry Girl Cookbook.

Chicken D'lish Kebabs

1/4 c plain fat-free yogurt
1 t lemon juice
1/4 t curry powder
1/4 t garlic powder
1/4 t onion powder
1/4 t salt
Dash Paprika
12 ounces raw boneless skinless lean chicken breasts, cut into 1.5 inch cubes
2 red bell peppers (I'm not a huge fan of bell peppers...I used whole mushrooms sliced in half)
1 large yellow summer squash
1 onion

In a medium bowl, combine yogurt, lemon juice adn all seasonings. Stir well. Add chicken and coat completely. Cover and refrigerate for at least 1 hour.

Meanwhille, cut bell peppers, squash and onion into chunks equal in size to the chicken cubes

Skewer the chicken and veggies alternately onto four skewers, packing the pieces together tightly

Spray grill lightly with nonstick spray and bring to medium-high heat

Grill kebabs for 5 minutes with grill cover down. Then carefully flip kebabs with long barbeque tongs

With the grill cover down, grill for another 5-7 minutes, until chicken is cooked through.

Remove from grill and allow to cool slightly. Once cool enough to handle pull chicken and veggies off the sticks and eat.


Another winner in our household!

Bacon Ranch Broccoli Cole Slaw

The recipes for the week are from the brand new Hungry Girl cookbook that I could not WAIT to use! Check out http://www.hungry-girl.com. Her cookbooks are amazing! Wait until you see what we have in store for this week!

This was a great break from your typical cole slaw. I personally am not a fan of cole slaw and this was a great mix for me!


Bacon Ranch Broccoli Cole Slaw

2/3 c fat-free sour cream
1.5 T dry ranch dressing/dip seasoning mix (I use more...I love the ranch flavor!)
One 12-ounce bag dry broccoli cole slaw
1/4 c precooked real crumbled bacon

Combine sour cream and seasoning mix in a large bowl and stir thoroughly
Add slaw and toss to coat. Add bacon and mix well
Cover and refrigerate for at least 2 hours, or until ready to serve.

Tuesday, June 1, 2010

Banana Bread

If you've been following my 365 Project...you will see I had a special shout out recipe. Tammi sent me over a loaf of banana bread that DF and I devoured quickly...typically with every meal and inbetween. Its a healthy recipe and we loved it! I had to share it already! Thanks Tammi =)

Banana Bread ala TP

In large bowl combine:
1.5 Cups Mashed Ripe Bananas
1/4 Cup apple juice, undiluted
1/2 Cup Sugar (TP used Splenda)
2 egg whites
1 t vanilla
1 t orange peel (rarely used)

Add:
2 c whole-wheat flour
1 t baking soda
1/2 t salt
1/2 t coriander
1.5 t cinnamon

Mix well. Spray 9 x 5 x3 inch loaf pan with vegetable cooking spray. Cook at 350 for 45-50 minutes

Tips from TP: If you're looking to increase your fiber intake, add Benefiber Powder; The "kids" box of 100% apple juice works well and one box makes 2 loaves. Freeze your bananas when they become ripe. Unthaw the bananas, cut off one end and squeeze them directly into the measuring cup. Make several loaves at a time and freeze so you always have bread!

Diet Soda Cake

Its been a lazy few days...and you will see it only gets lazier.

When I was attending weight watchers meetings I was introduced to the "healthier" cake. I've been making it and surprising people left and right. I did these as cupcakes but one form that I do love to do is use a large triffle bowl and layer crumbled cake pieces with fat free cool whip. Not only does that produce an awesome presentation our dinner guests have loved them!

This is a simple one! Enjoy!


1 Can Diet Soda
1 Box Cake Mix
1 Tub Fat Free Cool Whip as topping


Mix your one can of diet soda with your one box of cake mix and place into pan and cook as you would normally. Top with Fat Free Cool Whip. My most popular combinations have been White Cake Mix + Diet Cheerwine and White Cake Mix + Diet Sunkist (I do miss the Diet Cherry Vanilla Dr. Pepper...that was my favorite!)

Related Posts Plugin for WordPress, Blogger...